Goods Home Design
Admin

Posts : 71
Join date : 2013-08-25
 |  Subject: DIY Food Storage Drying Rack Wed Aug 28, 2013 4:24 pm Subject: DIY Food Storage Drying Rack Wed Aug 28, 2013 4:24 pm | |
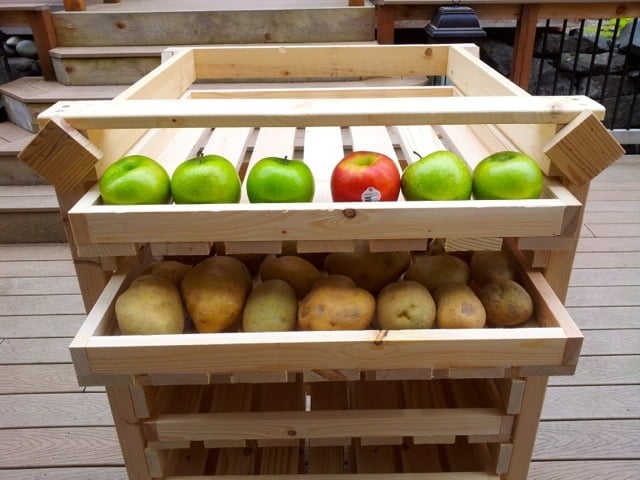
| DIY Food Storage Drying Rack  Growing your own food can be very rewarding .. Here we have a DIY Food Storage instructions: Includes free plans, a cut list and general instructions. Each level/drawer is well ventilated making this project ideal for long term storage.    See the instruction >> here<<  Add FaceBook Comment / Mention your Friends |
|
Goods Home Design
Admin
Posts : 71
Join date : 2013-08-25
| | Subject: Re: DIY Food Storage Drying Rack Sat May 17, 2014 3:43 pm | |
| FOOD STORAGE SHELF
JUNE 18, 2012 |
43 COMMENTS
POSTED BY ANA WHITE
 PDF version PDF version
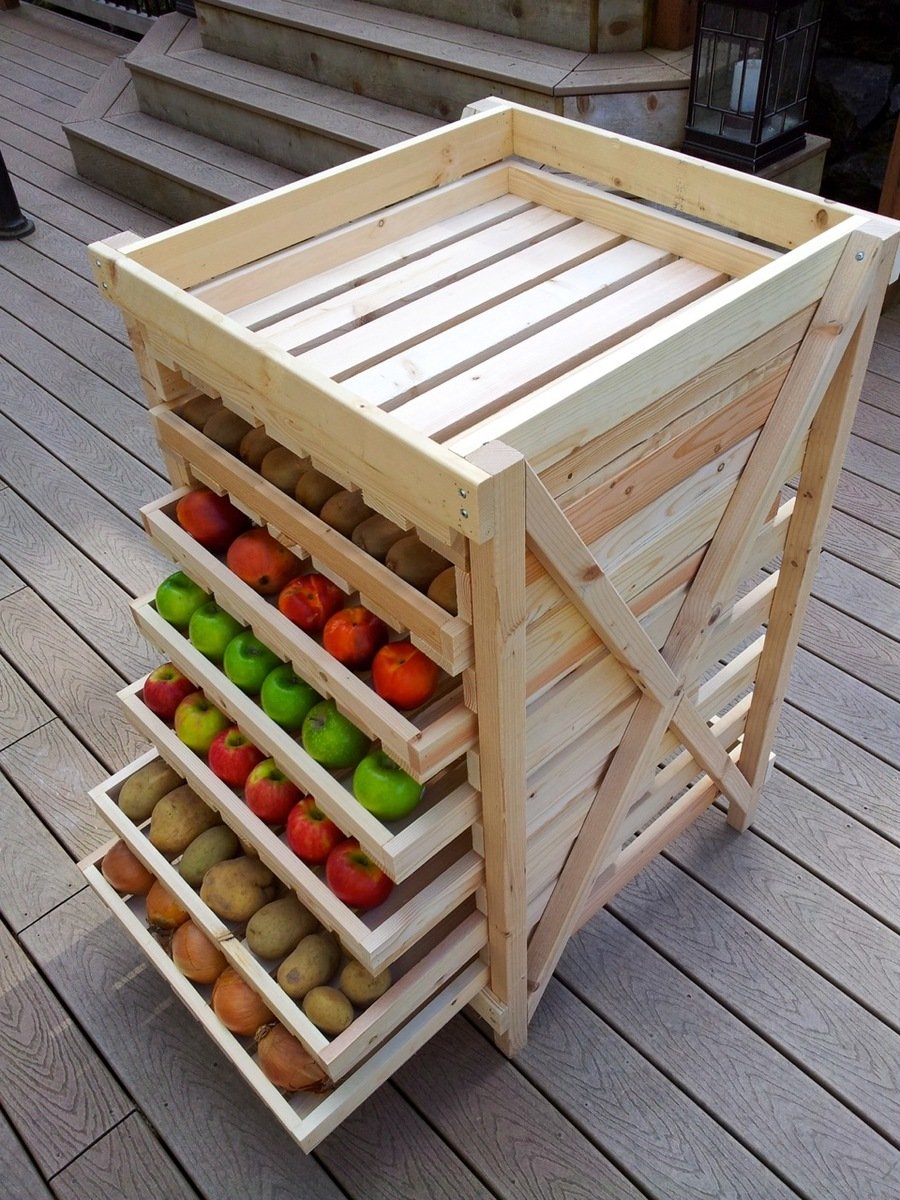
Build a produce food storage drying rack! Free plans from Ana-White.com
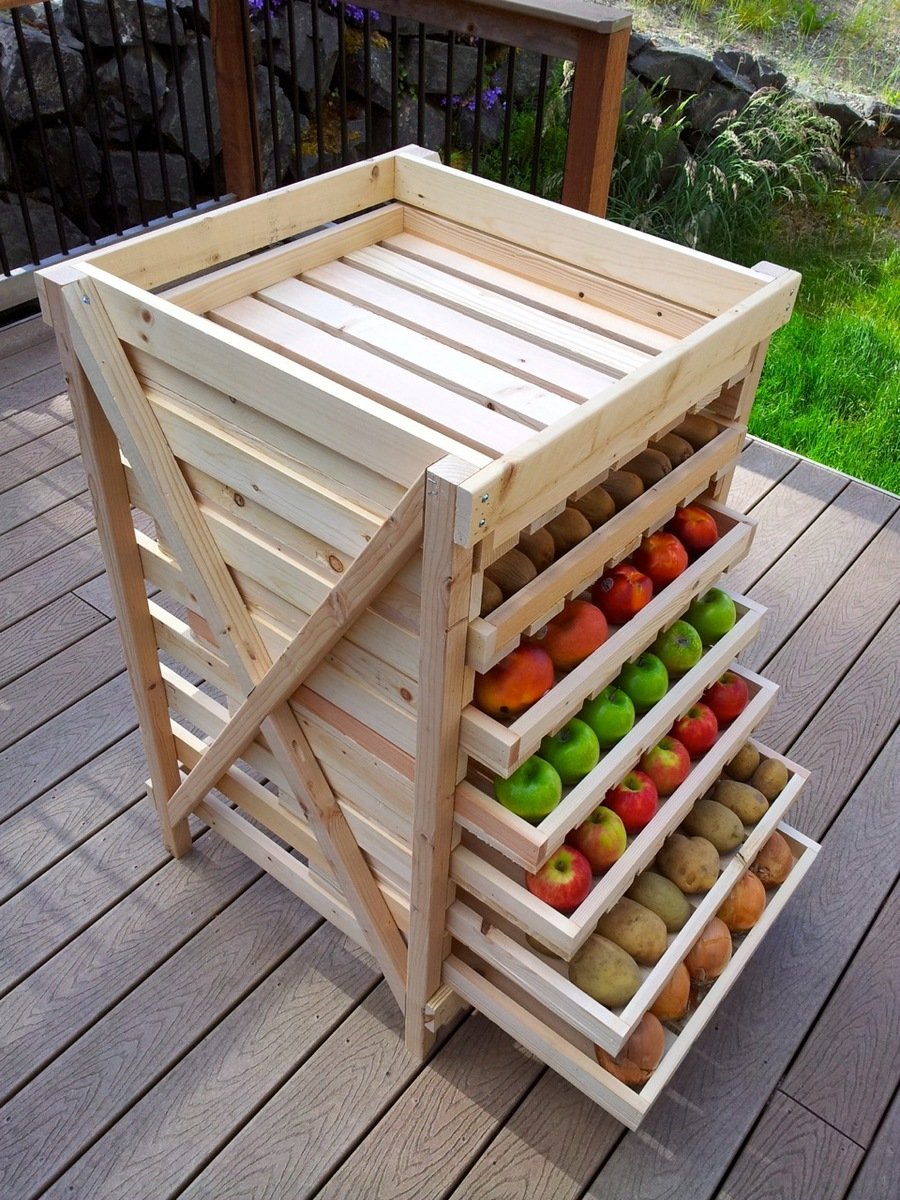
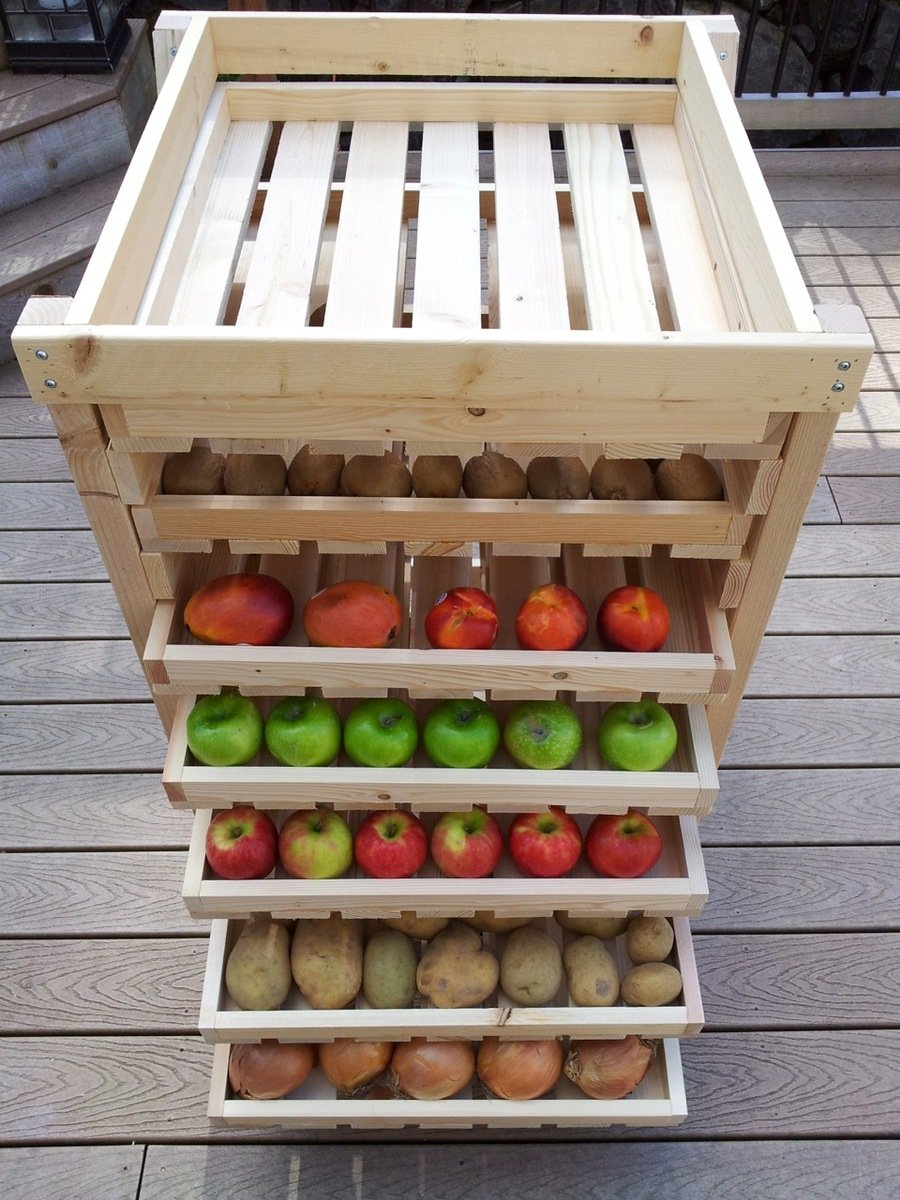
ADDITIONAL PHOTOS
Photo Credits:
Serena
HANDMADE FROM THIS PLAN >> PROJECTS BUILT FROM THIS PLAN. THANK YOU FOR SUBMITTING BRAG POSTS, IT'S APPRECIATED BY ALL!No brag posts have been found yet. Have you built this project? Please help other by submitting brag posts.
ABOUT PROJECT
Author Notes:
Hi everyone and Happy Monday!!!
A few weeks back, on our Facebook Page, you asked for a food storage shelf.
Now I get it. When harvest time comes, you need somewhere to dry all of your produce and store it for the winter. If taken care of properly, you could be enjoying garden fresh carrots and potatoes all winter long!
But I really like to try to have each plan built before it gets posted - just in case it's got a flaw or it could be made better.
Serena, one of our lovely readers, was so kind to volunteer to build this food storage shelf for us!
And I am so glad she did!

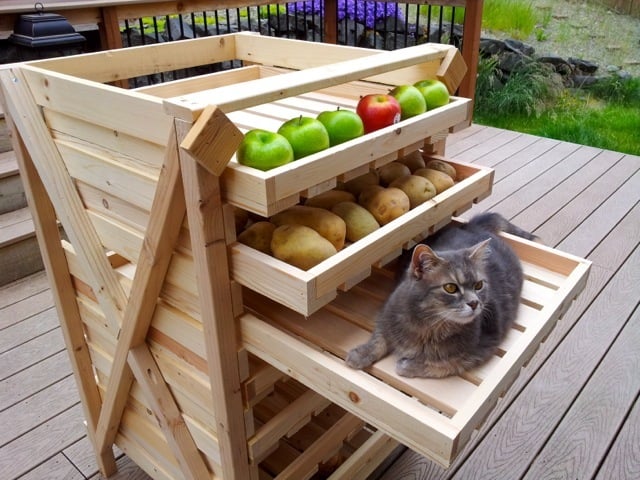
Because Serena noted that the top shelf was a little tight on space.

So we made the plan a little better for you and suggest putting the top brace on top - not in front. I think the cat approves!
Thank you so much Serena for making this plan possible!
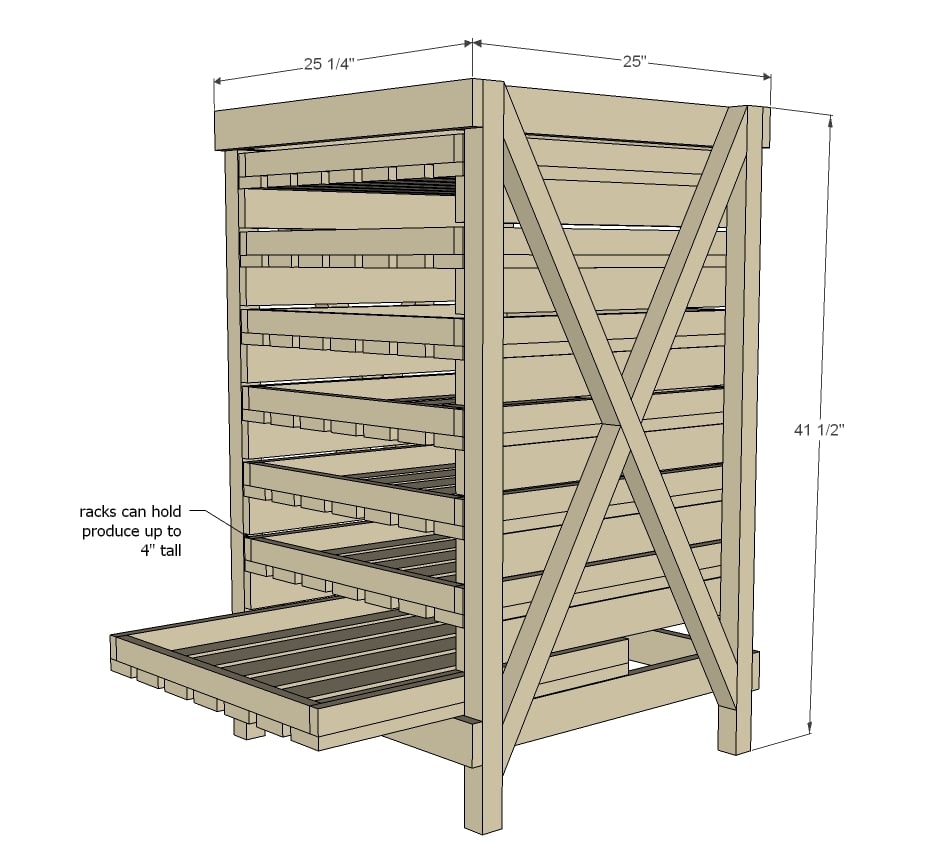
DIMENSIONS
Dimensions:

MATERIALS AND TOOLS
Shopping List:
4 – 2x2 @ 8 feet long
14 – 1x3 @ 8 feet long
7 – 1x2 @ 8 feet long
1 ¼” and 2” finish nails
2” screws
Recommend also 2 ½” PH screws
CUT LIST
Cut List:
FRAME
4 – 2x2 @ 41 ½” (legs)
16 – 1x3 @ 23 ½” (side drawer glides)
2 – 2x2 @ 41” (LP to SP, both ends cut at 60 degrees off square, ends parallel)
4 – 2x2 @ 20 ½” (longest points, one end cut at 60 degrees off square, other at 30 degrees off square, ends are cut in same direction but not parallel)
4 – 1x3 @ 25 ¼” (front/back supports)
DRAWERS
14 – 1x2 @ 23 ½”
14 – 1x2 @ 20 ½”
49 – 1x3 @ 23 ½”
GENERAL INSTRUCTIONS
Please read through the entire plan and all comments before beginning this project. It is also advisable to review the Getting Started Section. Take all necessary precautions to build safely and smartly. Work on a clean level surface, free of imperfections or debris. Always use straight boards. Check for square after each step. Always predrill holes before attaching with screws. Use glue with finish nails for a stronger hold. Wipe excess glue off bare wood for stained projects, as dried glue will not take stain. Be safe, have fun, and ask for help if you need it. Good luck!
STEP 1

It is very important to make sure that the ends are built identical and square. The side rails will actually serve as drawer guides, so you will want to make sure the guides are attached square too. I recommend first taking all of your 2x2 legs and marking all of them at the same time with the side rail locations. Then you can attach. You can attach the siderails with 2” finish nails and glue.
STEP 2
Now the X braces will keep everything square. Some miter saws will cut a 60 degree angle, but if yours does not, you will need to mark the angle with a square or protractor and cut with a circular saw. Remember that the angle is 60 degrees OFF SQUARE, so this would mean 30 degrees from the edge of the board.
Attach the cross braces to all siderails and legs.
STEP 3
Once both legs are done, all you have to do is add the front/back supports.
STEP 4
And then build trays. Trays must be built square to slide right.
STEP 5
And then slide the drawers in!
STEP 6
Serena felt like the original instructions made the top shelf too tight for accessing produce, so we modified to place the front support on top. She blocked the front just for decorative purposes. This makes the top shelf much larger.
FINISHING INSTRUCTIONS
Preparation Instructions:
Fill all holes with wood filler and let dry. Apply additional coats of wood filler as needed. When wood filler is completely dry, sand the project in the direction of the wood grain with 120 grit sandpaper. Vacuum sanded project to remove sanding residue. Remove all sanding residue on work surfaces as well. Wipe project clean with damp cloth. It is always recommended to apply a test coat on a hidden area or scrap piece to ensure color evenness and adhesion. Use primer or wood conditioner as needed. Add FaceBook Comment / Mention your Friends |
|


 Sun Nov 27, 2016 10:46 am